Alright, ladies, let’s talk about the most dreaded aspect of your beauty regimen – hair removal. Those stubborn hairs keep returning despite your best efforts, hindering your quest for silky-smooth skin! Have you ever wished for a permanent solution? Look no further; enter DIY laser hair removal – the simplest, easiest, and best solution. If you’re unfamiliar with this method, don’t fret; we’ve got you covered.
About DIY Laser Hair Removal
If you are tired of all the shaving and waxing, the laser treatment can be the perfect way to zap your body hair. You can visit a reputed salon and opt for a laser treatment under the supervision of an expert who will help you remove body hair permanently by disabling the hair follicles. Moreover, this revolutionary technology has now been made available as easy-to-use ‘DIY kits’ under many famous brand names. You no longer need to visit the salon and spend large amounts to undergo treatment. Using these kits, you can get a laser treatment right from the comfort of your home, and they work as effectively as the professional systems do for permanent hair removal. (1)
Also Read – Intense Pulsed Light (IPL) Laser Treatment, Is It Worth Trying?
What Are Included In The DIY Kits?
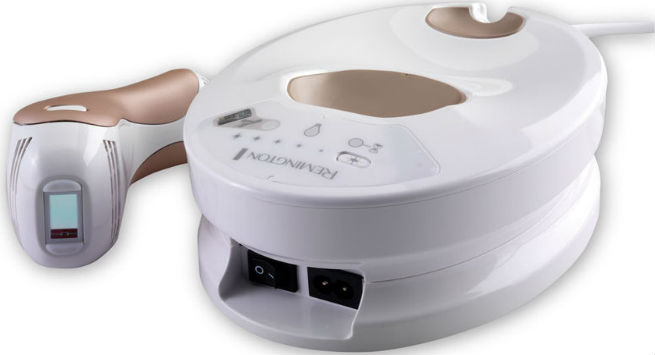
A potent laser device, either battery-powered or connected to a central unit, is at the core of a DIY laser hair removal kit. When battery-driven, the kit naturally incorporates the required power source. Alternatively, if connected to a central unit, the system activates when plugged into a power socket. Beyond the essential components, specific kits boast additional accessories like shavers or epilators, seamlessly attachable to the central unit for swift and comprehensive hair removal.
How Does DIY Laser Hair Removal Work?
Let’s take a look at how the DIY Laser Hair removal technology works: (2)
1. Working Procedure:
The device sends out a laser beam or an intense pulsed light, which is focused on the targeted areas of the skin. This light converts into heat when absorbed by hair shafts and hair follicles. The melanin in the skin absorbs this heat, eradicating the follicles. As a result, all the hair in the areas where the laser was applied fell out within a week or two.
2. Ideal Candidates:
Since the heat is absorbed by melanin, the more melanin in your skin, the higher the heat enters your skin. Darker skin tones absorb more heat. Hence, they have a high chance of getting burnt. So, most at-home treatments are recommended for people with fair to medium skin color.
Also Read- 3 Homemade Wax Recipes for Facial Hair Removal You’d Love to Try
3. Frequency Of Treatment:
The treatment works on all hair follicles in their growth phase, accounting for 90% of your body’s hair. Therefore, most brands recommend that the treatment be done once a week, at least for the first few times, to ensure that all the active hair follicles on that part of the skin are covered. After six treatments, you can choose to do it as and when there is new hair growth, which should not be that often anymore.
Also Read – Waxing Vs. Epilators – Which Is A Better Method Of Hair Removal?
Usage Of DIY Laser Hair Removal System
Now, here are the simple and easy steps you need to follow to use your DIY laser hair removal system at home:
- Shave off all the existing hair. It may sound ironic as your final goal is hair removal only, but this is done to have a clean workspace on which you can move your laser device smoothly. It also ensures that the intensity of the laser beam is optimum when it reaches the follicles.
- Turn on the laser device using its ‘start’ or ‘power’ button. Most such devices come with adjustable intensity levels. Hence, you need to start with the lowest level of intensity and increase it gradually as per your comfort.
- Do a patch test on a small part of your skin. You will see the device emanating a bright light when it comes in contact with the skin. You will also realize that the light turns into heat in your skin, with a heavy feeling of pinching. However, no irritation or burning sensation should occur after a few hours.
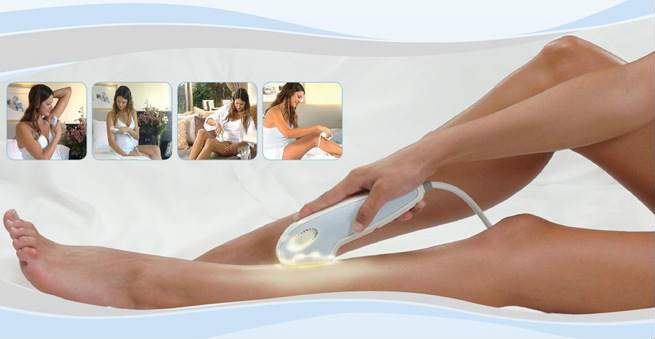
- Now, go on and zap the device on your skin. Keep moving it just the way you would move a razor. You will feel your skin heated for a few seconds, but nothing will happen.
- Run the device all over the parts of your skin from where you want to remove hair and repeat 2-3 times as needed.
- Doing this once every week for six consecutive weeks will make all the hair on the treated parts fall off.
- It is safe to use on the face and any other body part. Just be careful not to linger on any part of the skin for longer than a few seconds.
Also read: Does Tweezing Make Hair Grow Thicker? We Busted the Myth!
How Much Does It Cost?
Different brands offer DIY laser hair removal kits at different prices, even though their features are more or less similar. The average price of such kits is around $400.
Is DIY Laser Hair Removal Safe?
At-home laser hair removal treatment is known to be entirely safe for use. Ensure you thoroughly review the user manual and do the patch test before performing the procedure. Also, ensure you follow all the instructions carefully and use the device patiently.
DIY laser hair removal kits completely free you from the hassles of tweezing, waxing, and shaving. Bring one home and start your journey to be permanently fuzz-free! (3)
Also read: Sugaring For Hair Removal – What Do You Need To Know?
Summary
Are you tired of the perpetual cycle of shaving and waxing? DIY laser hair removal offers an at-home solution, eliminating the need for salon visits. These kits feature potent laser devices, either battery-powered or connected to a central unit. The laser emits focused light on targeted skin areas, converting into heat and absorbed by hair shafts and follicles. Melanin absorbs this heat, eradicating follicles and resulting in hair falling out within a week or two. Ideal for fair to medium skin tones, weekly treatments for six weeks yield permanent results. Kits cost around $400, providing salon-quality efficacy and freeing users from the hassles of traditional hair removal methods.
Frequently Asked Questions
Why choose DIY laser hair removal?
DIY laser hair removal offers a convenient and cost-effective alternative to traditional salon treatments. It provides permanent hair removal by disabling hair follicles; easy-to-use kits are available for home use.
What components are included in DIY laser hair removal kits?
DIY kits feature a potent laser device, either battery-powered or connected to a central unit. Battery-driven kits include the power source, while others activate when plugged into a power socket. Additional accessories like shavers or epilators may be included.
How does DIY laser hair removal work?
The device emits a laser beam or intense pulsed light focused on targeted skin areas. The light converts into heat, absorbed by hair shafts and follicles. Melanin in the skin absorbs this heat, eradicating follicles and causing hair to fall out within a week or two.
Who are the ideal candidates for DIY laser hair removal?
At-home treatments are recommended for individuals with fair to medium skin tones. Darker skin tones absorb more heat, increasing the risk of burns. The therapy works on 90% of body hair follicles in their growth phase.
Is DIY laser hair removal safe?
At-home laser hair removal is considered safe when following user manuals and conducting patch tests. Users should adhere to instructions, adjust intensity levels gradually, and avoid lingering on any skin area for an extended period. Kits cost around $400, providing a salon-quality experience and liberating users from traditional hair removal hassles.


