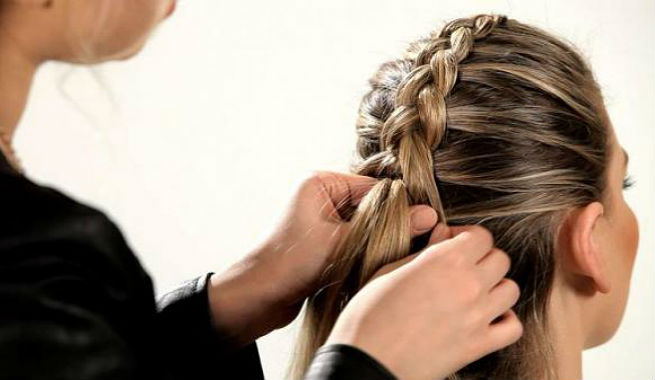
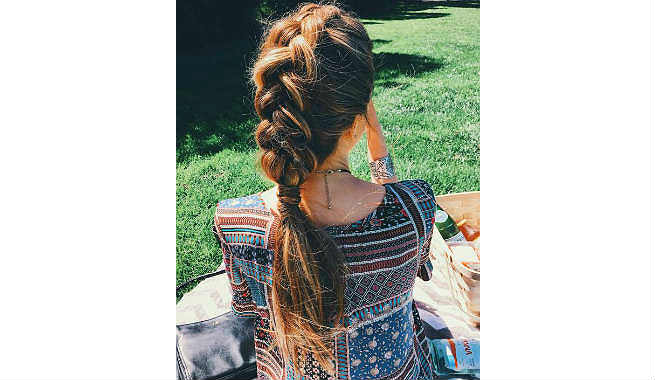
The enduring charm of long, glossy braids has transcended time, with certain enchanting braid styles making recurrent comebacks. The ‘Dutch braid’ or ‘milkmaid braid’ is a resurging hair trend gaining popularity. This stunning hairstyle graces various occasions, from Red Carpets to fashion runways. Discover how to master the art of Dutch braiding and effortlessly flaunt it this season.
How To Create A Dutch Braid
Creating a regular Dutch braid is not at all a Herculean task. Here are the details and the step-by-step procedure that you need to follow: (1) (2)
Products You Will Need:
- A good hair mousse, also called ‘hair styling foam,’ gives additional volume and shine (you may also replace it with a textured hair spray)
- A well-moisturizing pomade to make hair sleek and glossy
- A perfect edge control hair gel to give your style a subtle hold
Tools You Will Need:
- A hairdryer (make sure that it comes with a hair diffuser)
- A rat tail comb
- A hair-smoothing brush
- A few clear/transparent elastic hair bands
- A few hair pins (try to get ones that are explicitly designed for halo braid style)
Steps You Have To Follow:
- Start with moistening your hair slightly, as it is easy to create the Dutch braid style when damp (the hair should not be dripping wet under any circumstances). It also gives a neat and clean look upon finishing.
- Apply a good amount (a golf ball-sized quantity will do) of hair mousse or styling foam all over your hair, focusing on the roots. You can divide all your hair into multiple sections for ease of application and distribute it uniformly by combing with a smoothing brush or running your fingers through your hair. If you want to skip mousse, give the texture hairspray a try. It will work the same way and provide damp hair an excellent hold.
- Smoothen your hair with the smoothing brush and bring it to one side of your head. Try to keep it as much frizz-free as possible.
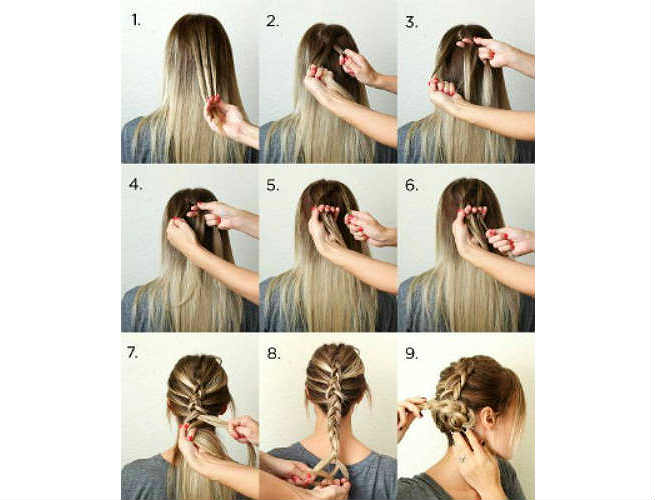
- Split all your smoothened hair into three separate sections and hold them between your index and pointer fingers.
- Grab the left section of hair between your left hand’s pointer finger and thumb. Keep the middle section free at this time. Also, grab the right section of hair using your right hand’s thumb and index finger.
- You are now braiding your hair by intertwining those three sections in the Dutch style. Cross the right section of hair underneath the middle section of hair. Please do the same for the left section and bring it under the middle section.
- Then, pick a smaller section of hair from the right side using your pointer finger and add it to the right strand before crossing it under the center section of hair strands.
- Similarly, pick a smaller section of hair strands from the left side of your head and add it to the left section before bringing it underneath the middle section.
- Thus, keep adding smaller strands of hair as you intertwine the three sections. It would be best if you tightly held down the plait under creation while the task was ongoing.
- Braid up your hair until you reach your desired length. You can also continue braiding your hair to the nape of your neck and leave the rest of the part loose for a more casual look.
- Secure the braid with one or more clear/transparent elastic bands (as needed).
- Use hair pins to keep all stray hairs in place.
- Apply some hair spray for a better hold of the style.
- You are ready to rock your Dutch braid now!
Also Read – All You Need to Know About the Fontange Hairstyle
Tips And Tricks To Know
While trying to master the art of Dutch braiding your hair, the following tips and tricks will turn out to be extremely helpful for you:
- Splitting the hair into three sections for braiding is the most vital part of this task. Try to create three equal sections to make a nice-looking plait.
- Do not try to attempt a tight braid at first. Instead, start with a looser version and go tight gradually.
- For a relaxed, casual look, you may also try making two regular Dutch braids with a neat center part at two sides of your head.
- For beginners, creating a perfect Dutch braid might be challenging. But remember, it is only practice that can make you perfect. So, keep practicing!
Summary
The Dutch braid, also known as the milkmaid braid, is a timeless hairstyle gaining popularity. From Red Carpets to runways, this elegant braid is everywhere. Achieving it is simple. Start with damp hair, apply styling foam, and divide it into sections. Braiding involves crossing sections under the middle and incorporating additional strands. Secure with clear elastics, use pins for stray hairs, and finish with hairspray. Tips include creating equal sections, starting with a looser braid, and practicing for perfection.


